I like to share with you my Ricoh GR Zone Focus Tips Howto shoot Closeup Street Photography using Snap Focus, Full Press Snap Focus and Manual Focus Mode.
Zone Focus Street Photography Example Videos
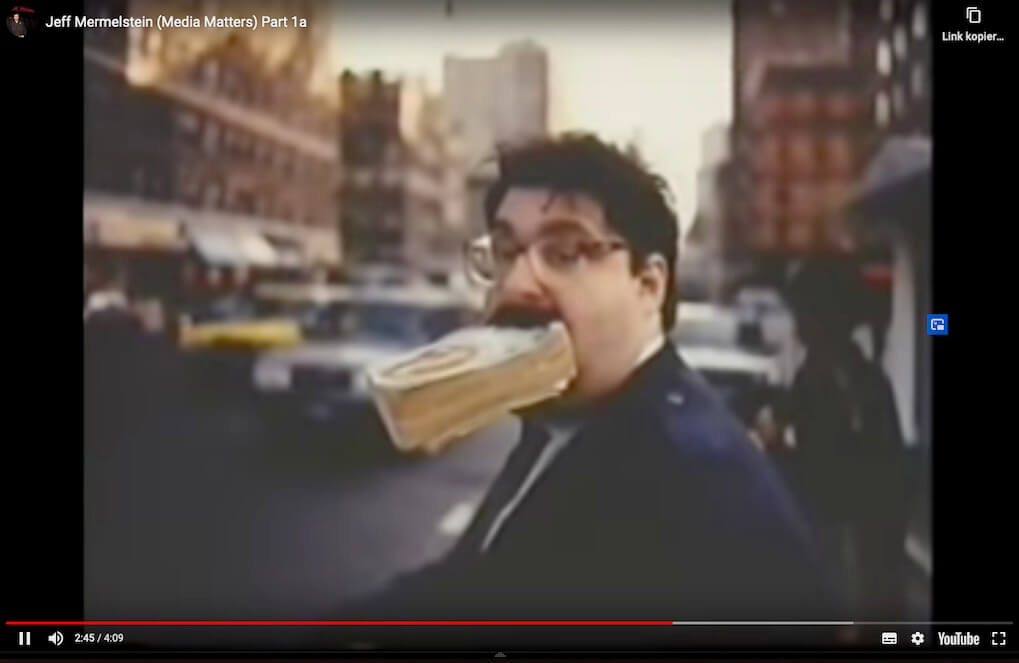
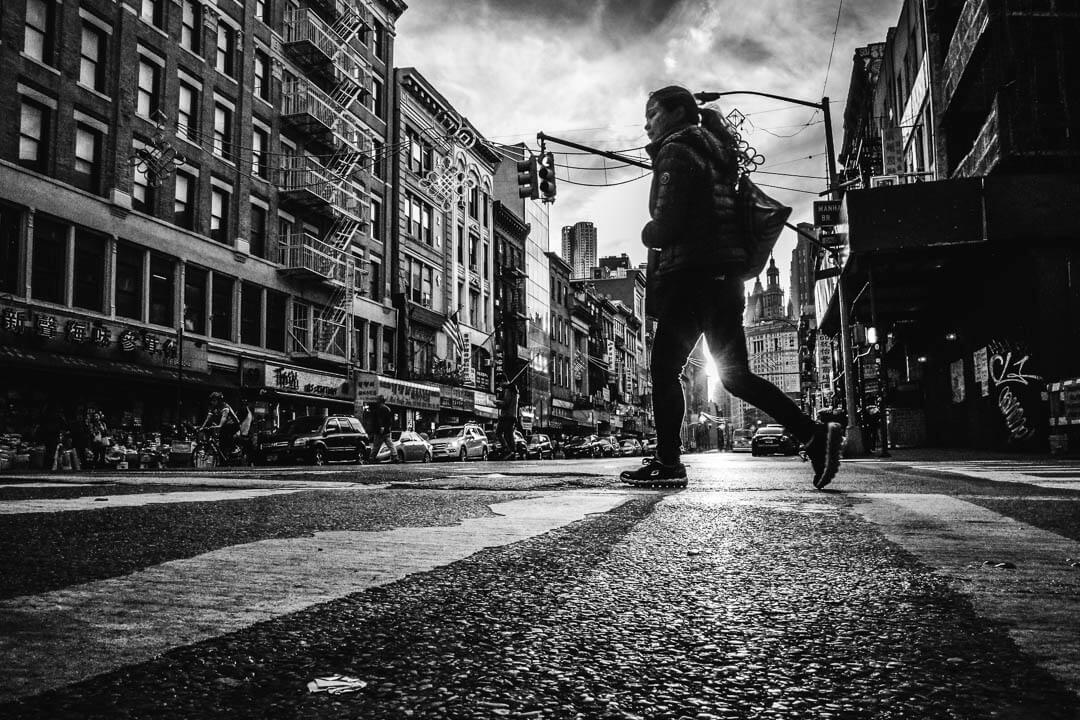
To get an impression of shooting street quickly consider watching the two short scenes from documentaries about Jeff Mermelstein and Bruce Gilden. Both are renowned street photographers living in NYC.
Jeff Mermelstein Leica M Zone Focus on the Street of NYC
Bruce Guilden Leica M Zone Focus & Flash NYC Street Photography
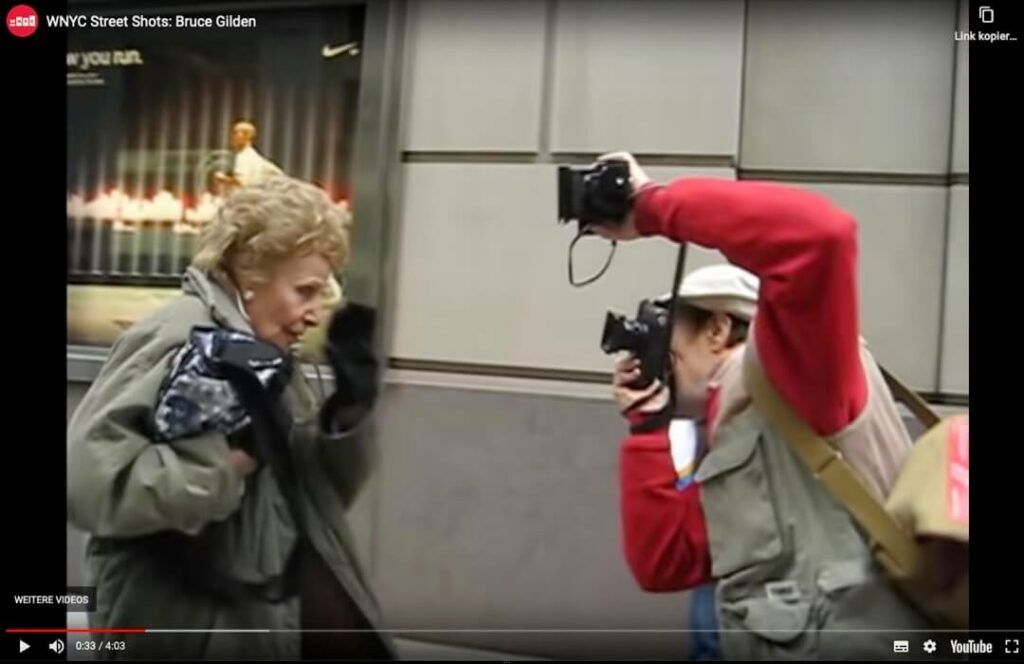
In the videos both use manual Leica rangefinder cameras which only support manual focus lenses.
Luckily our digital GRs feature Auto Focus, but it is of limited use when we want to do it like Jeff or Bruce. In order to make photographs quickly we can not rely on the GRs mixed Auto Focus performance. Instead we need to learn using the Zone Focus method, which consists of a preset focus distance in combination with the right f-stop Aperture and Shutter Speed number.
This posts aims to help understanding how to shoot with a GR, GR II and GR III using the Zone Focus Technique.
Ricoh GR Zone Focus Modes
Focus distance and Aperture define a limited Zone of Focus (also known as Depth of Field or short DoF) in which things appear acceptably sharp. The following Ricoh GR, GR II & GR III Focus Modes allow us to use Zone Focus.
- Snap Focus – A dedicated focus mode that allows shooting using one of the six predefined focus distances (1 m, 1,5 m, 2 m, 2,5 m, 5 m or Infinity).
- Full Press Snap Focus – A function to directly override Auto Focus and shoot using one of the six Snap Focus distances.
- Manual Focus – A dedicated focus mode that allows setting the desired focus distance anywhere between 6 cm (GR III), 10 cm (GR & GR II) and Infinity.
How to Control the Depth of Field Zone
Before learning how and when to use Snap or Manual focus we need to understand how to set and adjust the Depth of Field Zone.
Adjusting Focus Distance
When using the Ricoh GR, GR II or GR III Snap and Manual Focus you are telling the camera to focus on a specific distance in front of the lens.
- In Snap Focus mode this distance can be set to
- 1 m, 1,5 m, 2 m, 2,5 m, 5 m or ∞ Infinity
- 3.2 ft, 4.9 ft, 6.5 ft, 8.2 ft, 16 ft. or ∞ Infinity
- In Manual Focus mode, the focus distance can be set anywhere between:
- 6 cm / 2.3 in to ∞ Infinity (GR III)
- 10 cm / 3.9 in to ∞ Infinity (GR & GR II)
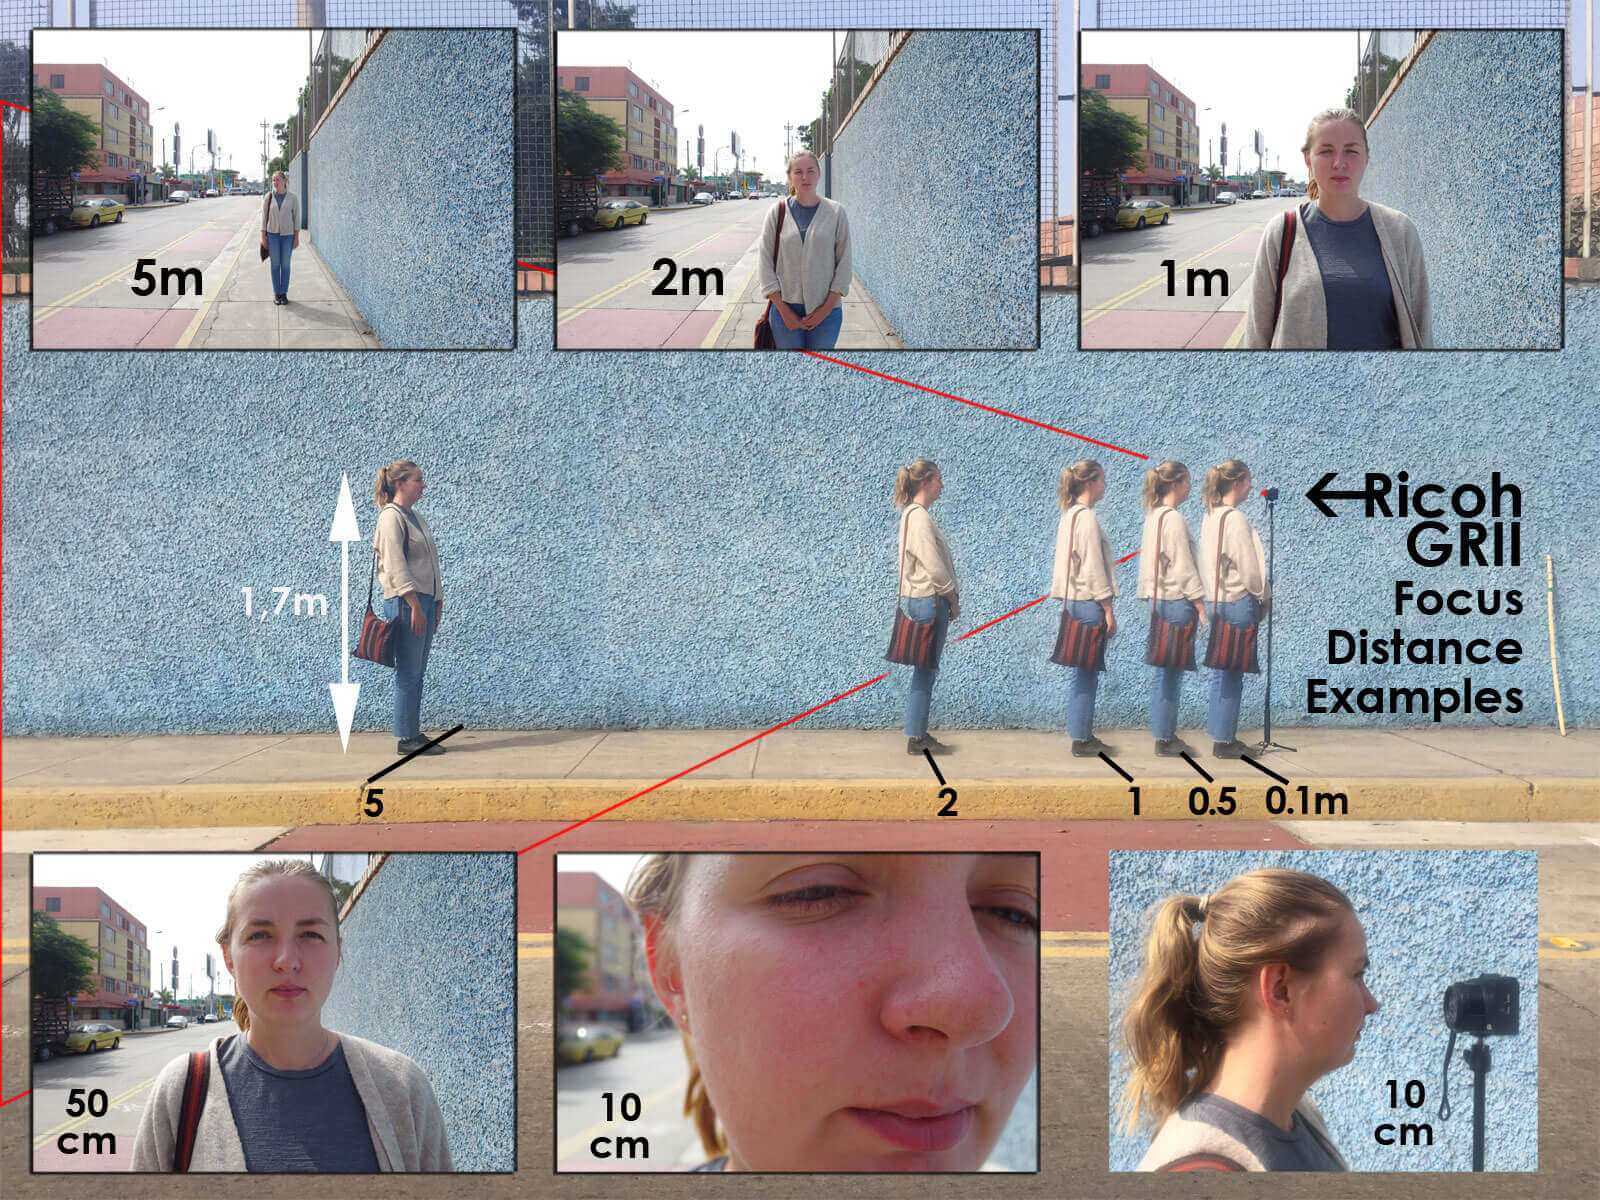
The image below will give you an idea how a photograph of an average sized person looks according to the 1m, 2m and 5m Snap Focus and 50cm, 10cm Manual Focus distance.
Adjusting Aperture
Depending on the chosen Aperture f-stop (f/2.8 – f/16) a Depth of Field Zone is created before and behind the chosen focus distance.
- The Depth of Field Zone represents the space before and behind the focus distance in which the object is photographed with acceptable sharpness.
- The closer the object is to the chosen focus distance, the sharper it will appear on the photograph (assuming a fast enough Shutter Speed is used accordingly).
Example
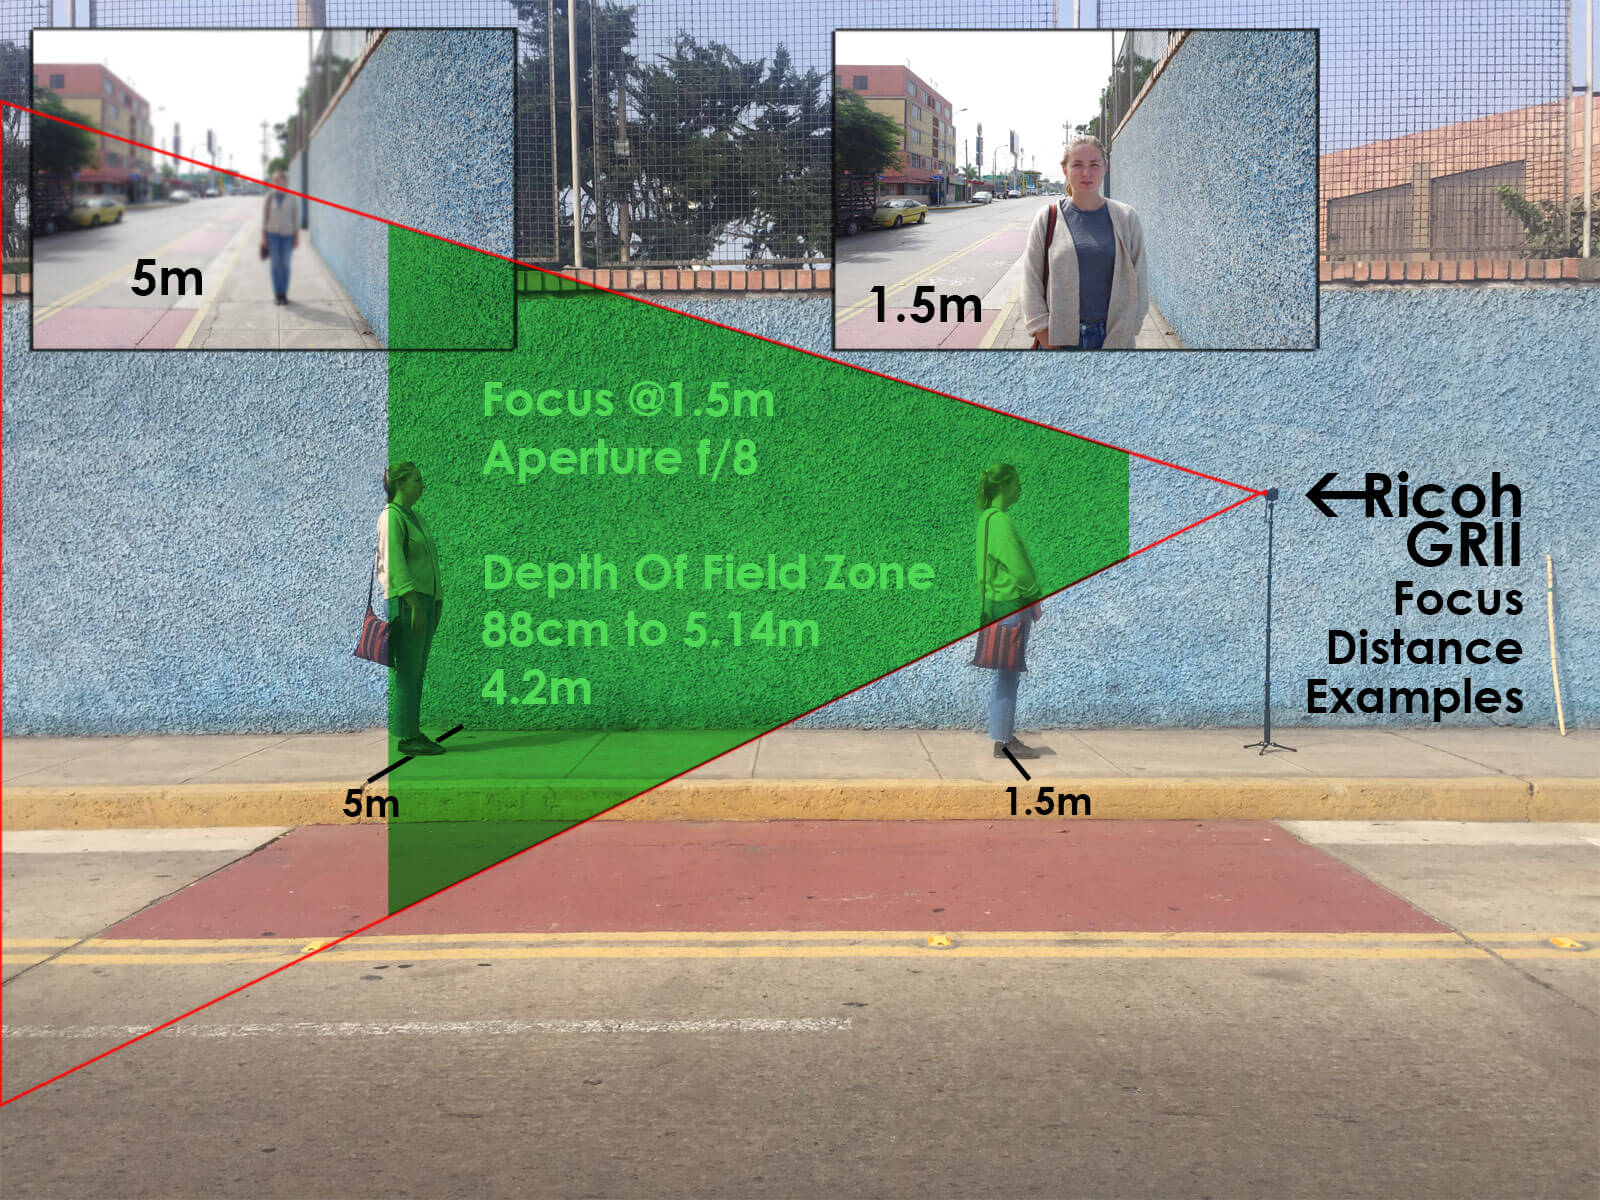
Lets set the Aperture to f/8 and Snap Focus Distance to 1,5 m.
- With these settings the Depth of Field Zone starts from 88 cm / 2.88 ft in front of the camera lens and ends 5.14 m / 15.8 ft away from the camera lens. In total 4.2 m / 13.7 ft.
- Object inside this zone will be captured with acceptable sharpness.
- The nearer the object to the 1.5 m focus distance, the sharper will it appear. (Assuming a fast enough Shutter Speed is used accordingly)
The image below is an example of the created Depth of Field Zone.
Note: The blur in the 5m photo is artificially created and only an approximation of the expected out of focus blur.
Depth of Field Summary
Adjusting the lenght of the Depth of Field Zone is done by either changing the Focus Distance, the Aperture f-stop number or both.
- To increase the DoF Zone
- Increase the Focus Distance
- Increase the Aperture f-stop number
- To decrease the DoF Zone
- Decrease the Focus Distance
- Decrease the Aperture f-stop number
Snap Focus Depth of Field Comparison Chart
The chart compares the lenght of the created Depth of Field for each Ricoh GR Snap Focus distance and full Aperture f-stop numbers f/2.8, f/4, f/5.6, f/8 and f/16.
How to read the DoF Comparison Chart
- Choose a Focus Distance number in the top row (for example 1.5 m)
- Choose a Aperture f-stop number in the 2nd row (for example f/8)
- Read the DoF start and end distance numbers from the top and end of the column beneath.
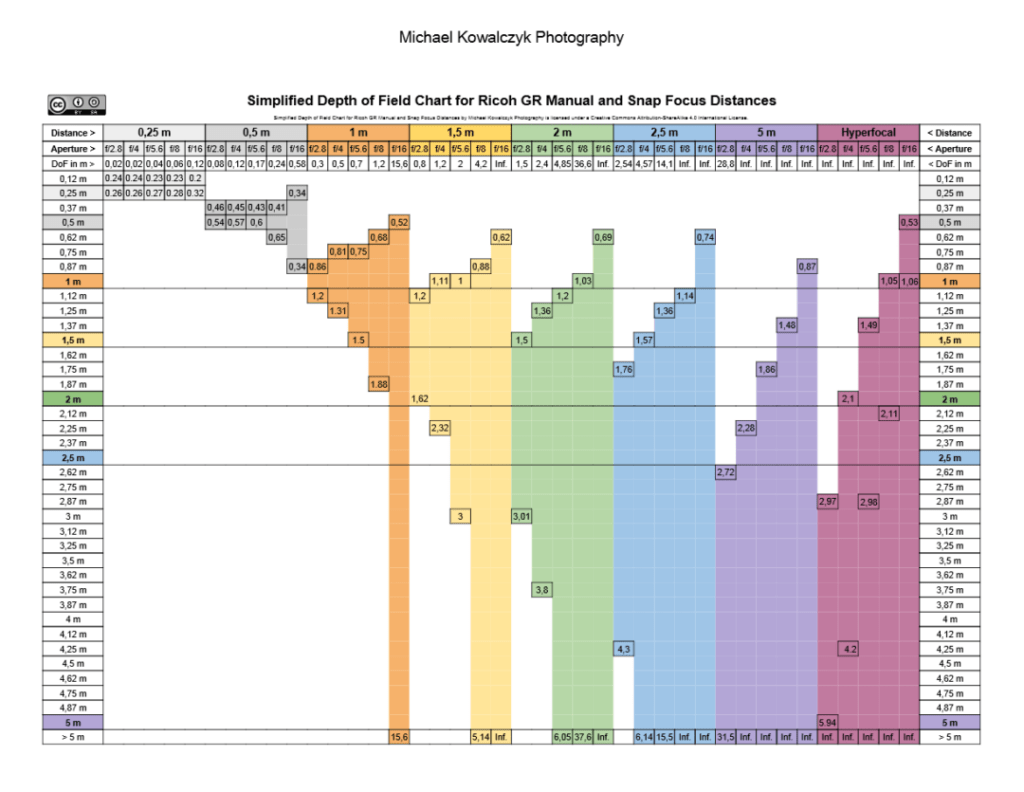
What is largest possible Ricoh GR DoF Zone?
- The largest possible DoF Focus Zone for Ricoh GR, GR II and GR III starts at 0,53 m and goes to Infinity. It is created when the Focus Distance is set to 1,06 m and the Aperture to f/16.
Recommended Ricoh GR Zone Focus Settings
The 1,5 m Snap Focus Distance & f/8 Aperture combination is good starting point for trying out Zone Focusing with a GR, GR II and GR III for the first time.
- You have plenty of Depth of Field to work with.
- The DoF Zone extends from 88 cm / 2.88 ft in front of the lens to 5.14 m / 15.8 ft. In total 4.2 m / 13.7 ft.
- The f/8 Aperture does not require high ISO values when shooting with reasonably fast Shutter Speeds in daylight conditions.
- 1/250th is a reasonably fast Shutter Speed for freeze-capturing regular human actions speeds like walking
- To maintain this speed I recommend using a shooting mode which allows using Auto-ISO, like TAv on GR & GR II or M on GR III.
- Set the Auto-ISO min and maximum numbers to a wider bandwidth ISO 100-3200 so that the Shutter Speed will remain stable, even if the available light intensity drops. (Those worried about Chromatic Noise should lower the maximum ISO to 1600 accordingly.)
When & How To use Snap Focus, Full Press Snap & Manual Focus
Snap Focus
A dedicated focus mode that allows shooting using one of the six predefined focus distances (1 m, 1,5 m, 2 m, 2,5 m, 5 m or Infinity).
When to use Snap Focus
It is liberating to set and forget about the focus distance, especially in combination with a higher f-stop number. The less settings you need to think about the more time you have to focus on timing and composition!
- Imagine setting the Snap Focus distance to 1m and the Aperture to f/16. The resulting 15,6 m long Depth of Field Zone (0,52 cm to 15,6 m) is huge and theoretically allows you to capture scenes like Medium Close Ups of people to Very Wide Shots without loosing time to Auto Focus.
- f/16 works best in bright and evenly lit environments such as a clear sunny day.
For focusing on subjects besides the DoF we must change to Manual or Auto Focus Mode. Switching from Snap to Auto Focus is easily done by appointing the (AF/Snap) switch function to a Fn Button.
How to use Snap Focus
- Select Snap Focus Mode in the camera menu: Menu > Shooting > Snap
- Set the Snap Focus distance, for example to 1 m
- Either from the camera: Menu > Shooting > Snap Focus Distance > 1 m
- Or by using a button combo: Press and hold the macro button (up) + turn the front adjustment wheel to the left (decreasing distance) or right (increasing distance)
- Notice that the selected Snap Focus distance is displayed in the upper right corner of the screen.
- Select a shooting mode which supports AUTO-ISO and Aperture change – P, Av, TAv or M (GR III)
- I recommend using either Av or TAv modes, both respect the chosen Aperture and offer use of Auto-ISO.
- On the GR III the TAv mode is available in Manual Mode with Auto-ISO.
- Select a higher Aperture number to increase the Depth of Field (f/16)
- Setting the Aperture to f/16 will results in a 15,6 m long of Depth of Field Zone.
- Check the Snap Focus DoF-Chart for other numbers or use the Online DoF Calculator.
- Try it out.
- Make sure that the Shutter Speed is fast enough to freeze peoples movements (1/250th – 1/500th should be safe)
Full Press Snap Focus
A function to directly override Auto Focus and shoot using one of the six Snap Focus distances
When to use Full Press Snap Focus
This function can become handy when you use Auto Focus as your default focus mode, as I do.
- Now and then I notice something worth photographing but there is very little time to react. Then I can point the camera and press the shutter button down fully. By doing so I tell the camera to simultaneously focus on my chosen Snap Focus distance and expose.
- The camera still needs to time move the lens to the Snap Focus position and I need to have luck that the photographed subject is in the DoF Zone, but at least I tried.
It is a nice to have reserve para(shoot).
Thinking about it now, it could be made more useful if we could also set a specific Aperture number together with the Full Press Snap Focus distance!
How to use Full Press Snap Focus
- Enable Full Press Snap in the camera menu: Menu > Shooting > Full Press Snap > On or Auto-Hi ISO
- Choose any Auto Focus mode
- Set the Snap Focus distance, for example to 1.5 m
- Either from the camera: Menu > Shooting > Snap Focus Distance > 1.5 m
- Or by using a button combo: Press and hold the macro button (up) + turn the front adjustment wheel to the left (decreasing distance) or right (increasing distance)
- Notice that the selected Snap Focus distance is displayed in the upper right corner of the screen.
- Try it out
- While shooting press the shutter button completely down immediatley.
- The camera will omit to Auto Focus and shoot using the Snap Focus distance which you have chosen in step 3.
- GR III Street Edition – “Full Press Snap by LCD” Special Touch Function!
- Instead pushing the Shutter Button the Camera allows making Full Press Snap pictures by Touching the Screen.
Manual Focus
A dedicated focus mode that allows setting the desired focus distance anywhere between 6 cm (GR III), 10 cm (GR & GR II) and Infinity.
When to use Manual Focus
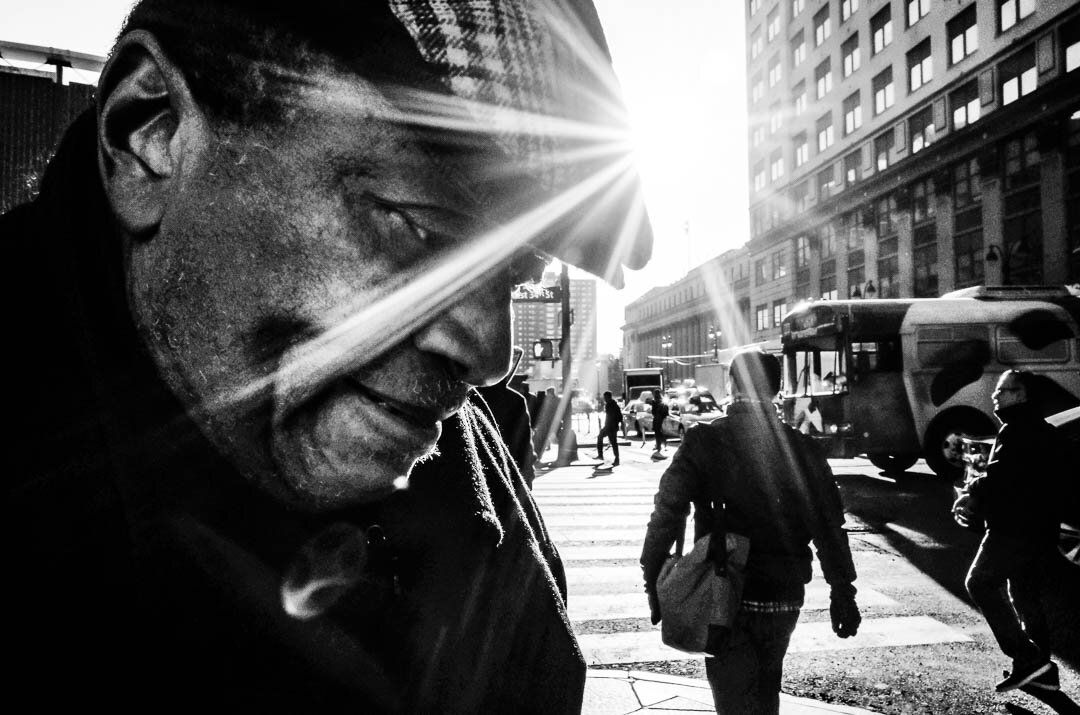
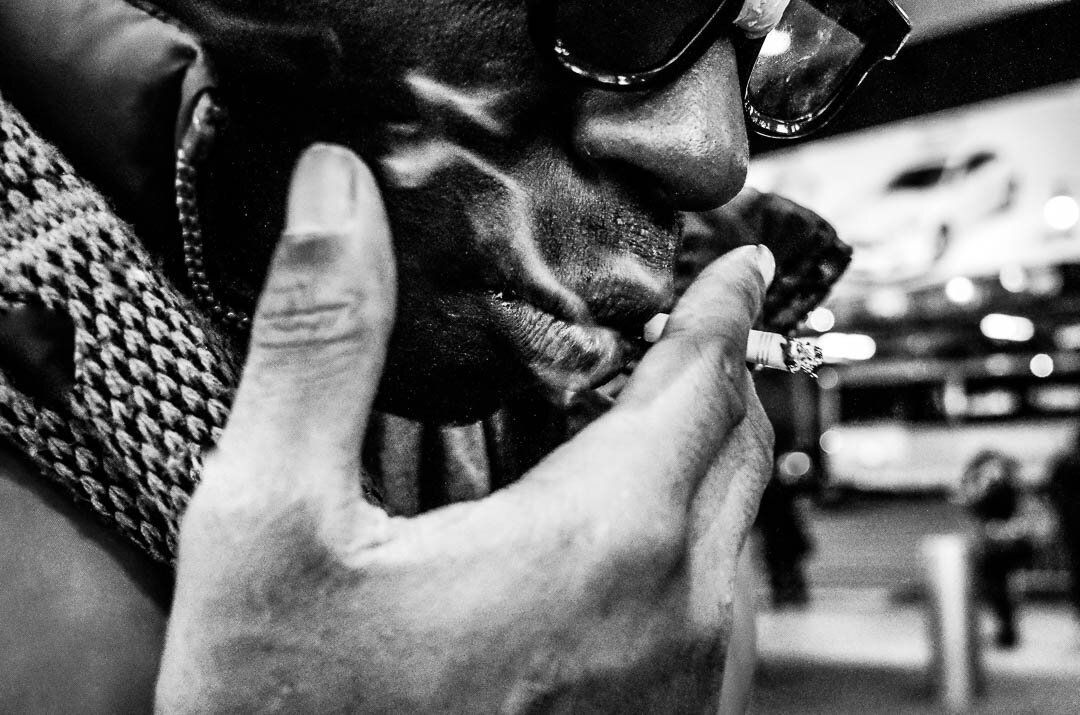
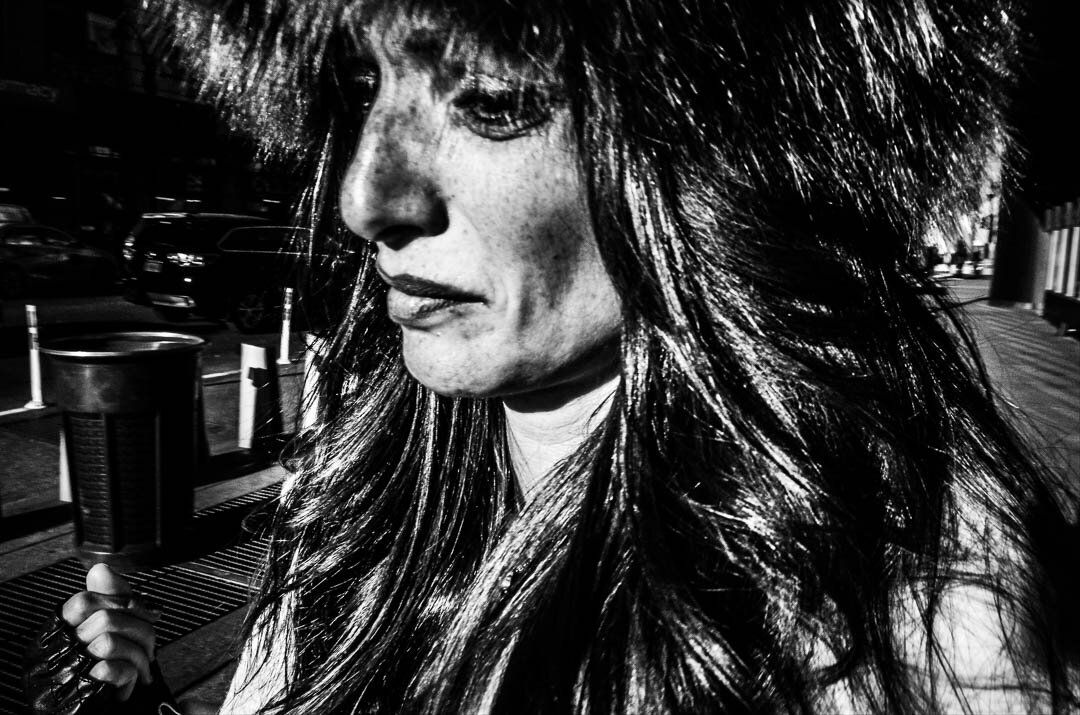
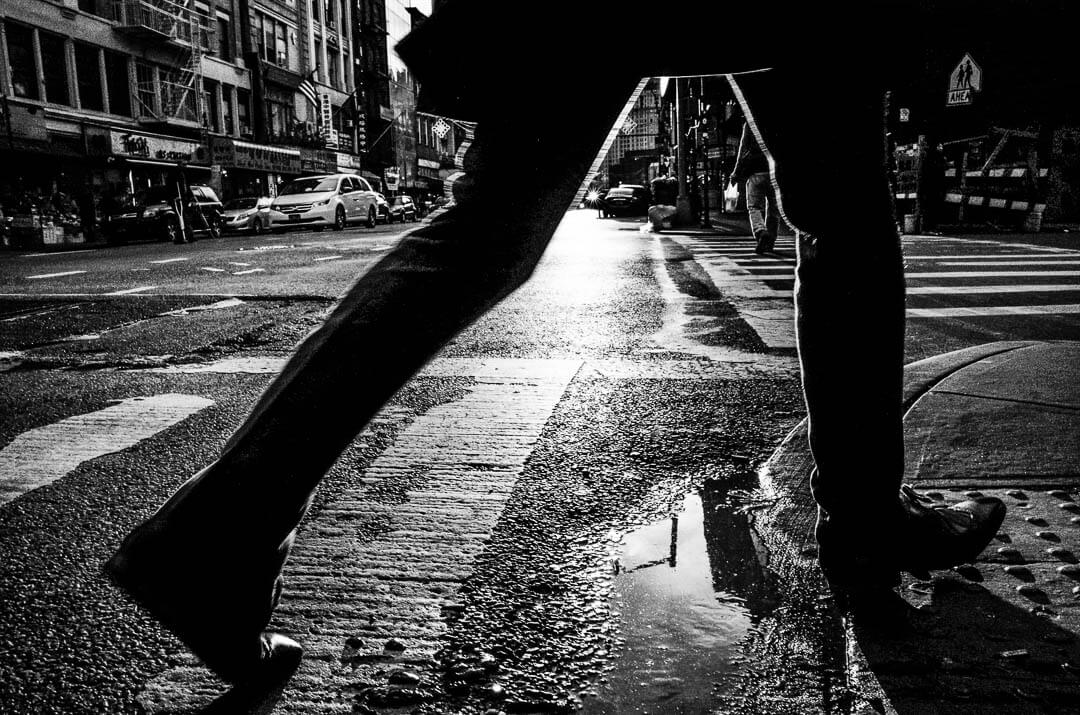
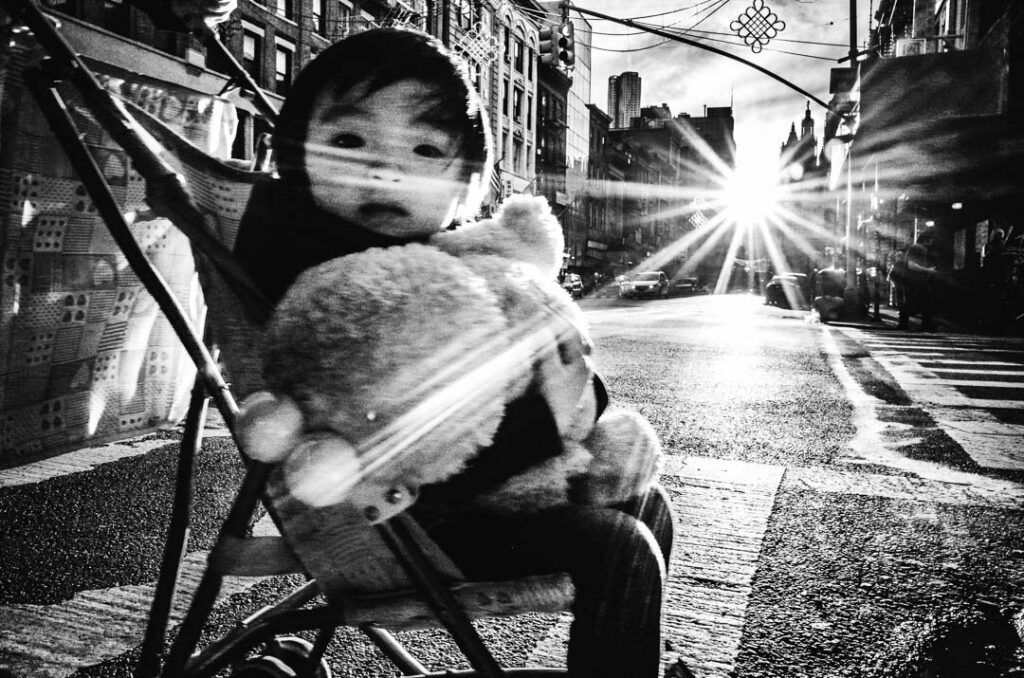
Robert Capa once stated “If your pictures aren’t good enough, you’re not close enough”. This is up for discussion but fact is that the closest Ricoh GR Snap Focus distance (1 m) and tiniest Aperture (f/16) will not enable you to quickly shoot sharp photos of people or objects up close.
- Can you guess the focus distance of the photo above? If not go back up to see the focus distance example
- To make this close up portrait I had to switch to Manual Focus and select a focus distance close to the macro range
Manual focus mode opens up the whole DoF range but the GRs focus adjustment implementation is rather clunky and the assisting focus display modes do not help much either IMHO.
Quick Manual Focus Tip!
Use Auto Focus first and change to Manual Focus by appointing the (AF/MF) switch function to a Fn Button. Once AF is acquired the camera stores the focus distance. It stays, even after power off/on. A really handy feature which I use a lot.
How to use Manual Focus
- Select Manual Focus Mode in the camera menu: Menu > Shooting > MF
- Set the Manual Focus distance for example to 0.5 m
- Using a button combo: Press and hold the macro button (up) + turn the front adjustment wheel to the left (decreasing distance) or right (increasing distance)
- Notice how the orange distance indicator bar is moving up and down on the lower left side of the display. The depth-of-field zone is displayed as a green rectangle around it.
- Select a shooting mode which supports AUTO-ISO and Aperture change – P, Av, TAv or M (GR III)
- I recommend using either Av or TAv modes, both respect the chosen Aperture and offer use of Auto-ISO.
- On the GR III the TAv mode is available in Manual Mode with Auto-ISO.
- Select a higher Aperture number to increase the depth of field (f/8)
- Setting the Aperture to f/8 will results in a shallow 0.24 cm depth of field with 0.41 cm of focus in front and 0.65 cm behind the 0.5 m away subject.
- Use the Online DoF Calculator to get numbers for other f-stops.
- Try it out.
- Make sure that the Shutter Speed is fast enough to capture movements (1/250th – 1/500th should be safe)
Don´t be afraid to get close, stay polite and be creative!
Latest post update 6th Sept. 2019 (Extending contents and moving post with comments to a new home, from michaelkowalczyk.eu to michaelkowalczyk.eu)
Hello michael! Just bought me a used Ricoh GR for fun. My question is: Does snap function only work in manual focus mode? Or does it also in A / F mode? I have difficulty seeing the snap funktione is in force or not? Hope you understand the question! Best regards Sean
Hi Sean!
Thank you for the question. I have updated the post and added how to use Full Press Snap Focus. This is the mode that is also available in every Auto Focus mode. Let me know if that was what you were looking for!
Best, MiK
Hello Michael, I’m a bit confused by the Snap Focus and the Full Press Snap Focus. It’s the same thing no ? What I understood on the GR (correct me if I’m wrong…) is that the Snap Focus allows us to keep working with the AF and when we want to take a shot with the Snap Focus, we just full press to bypass the AF. Btw I love how close you get to people. Awesome ! For the photograph with the woman, you were with the camera so close to her face !
Cheers Michael
Hi Jean
That´s right. The GR has a dedicated Snap Focus Mode where you can use only the predefined focus distances AND there is the option to use Snap Focus Mode when you are in Auto Focus Mode. To use Snap Focus you will have to enable it in the Camera Menu first. Then when shooting in Auto Focus Mode press the Shutter Button down fully. That will omit the cameras half-press Auto Focus function and you will shoot a photo using the selected Snap Focus distance instead. Hope that helps you to understand it more clearly.
Thank you for your thoughts about about the closeness. I think it is a style one has to try out at least once when shooting street, just to get a feel for it. Photographing like this happens to be very quick. For the particular picture I was walking in the opposite direction of the woman and raised my arm just before she passed. After trying it I realized that is is too intrusive for my personal taste (except some very special cases).
Here´s a tip if you want to try it: Stick around street crossings near transportation hubs (rail < -> bus) during peak hours (morning and after work). Cross the street with the people and snap along. Most people are rushing to catch their transports and wont complain because they are too tired 🙂
Best,
Michael
Hey Michael, thank you for this interesting article. I have to admin I’m a bit lost with the DOF chart… If I compare your chart with the DOF calculator I don’t get the same results :
With your chart : f5,6 / distance at 1.5 you say it’s clear from 1 to 3 meters.
From DOF calculator its says from 1.3 to 1.7….
Can you please explain me these differences ?
Thank you !
Thanks for the question Gilles!
I suppose you selected “Ricoh GR” in the online DoF calculator. This is the older model with a 1/1.7″ sensor. To get to the right value you can select Pentax K-5. To my knowledge it uses the same Sony sensor as in the GR and GRII. Also check out the Notes under the Ricoh GR DoF Chart made by Gerd Waloschek!
Hope this helps,
Michael
Thanks for the chart Michael. I have saved it to my phone for reference. I move too much when shooting, so have been trying Shutter priority at 1/1000 in good sunlight. Anything more than a couple of meters away has been in focus, but it can be an issue in shadows. Looks like f8 is the sweet spot for focusing so I will give that a try instead today. Maybe try 1/500 with auto ISO too.
Excellent, detailed guide which has explained where I was going wrong perfectly. Thank you for going to the trouble of producing this ?
Glad it helped you understand and apply the functions Steven. Today I added another section “Ricoh GR Focus Distance Examples” I hope it will help to get a visual idea in regards to different focus distances and possible results when photographing persons on the streets.
An excellent round-up of tips -but what I really loved is the DOF chart! This is extremely useful and I’ve been searching all over the internet for something like that -thank you 🙂 I’ve been using the Ricoh GR ii for almost a year now because I’m a street photographer enthusiast and -mainly- a travel writer. I wanted something light for my journeys and this is hands down the best camera I ever owned. Not sure if I will upgrade to the new version (GR iii) but I think I’ll stick with my current one. The results are stunning.
Keep up the good work and thank you once again!
George
Thanks for your feedback George, I am happy to hear that it is useful. I too traveled with the GR II for a year now and must say that it is a great travel companion. Sometimes I wished for a longer lens when in nature. It is ideal for street and documentary purposes for sure. I am curious, did you use the GH-3 lens adapter to protect the lens? I did and so far I had any dust issues. As for upgrading, I am not convinced about leaving the flash behind but I would enjoy making higher resolution images for sure.
Hello Michael,
sorry for the delay, I didn’t get a notification back for your message. To your question, no, I didn’t use the GH-3 adapter. I didn’t have so far any dust issues and I’m glad for it. I read a lot about this issue on the internet. It might have helped that I bought from day one a hard case that keeps it protected. So if I don’t use it for a couple of days in a row, I will have it in the case.
In general, I didn’t use any accessory, even though I was really tempted to use the external viewfinder. But I thought of having the raw Ricoh GR experience. I think I can’t get over the fact that it fits literally in your pocket. I also miss the longer lens in a variety of circumstances, but I guess that’s the price you pay for traveling light.
I’m not convinced either to upgrade to the GR iii. It is tempting though to have the IBIS plus a high-quality video -in the GR ii the video reminds me of a first generation smartphone video sometimes…But I’m gonna miss the flash, too, so I think I will stay with my GR ii 🙂
Hi George,
which hardcase would u recommend?
jp
Great guide. Thank you very much.
Thanks Jim, you are welcome. I updated the guide today.
Hi Michael
Very interesting article, but I am struggling to tell the difference between Full Press Snap Focus and Snap Focus. If I have already set the Snap Focus distance to 1.5 metres for example and I use Full Press Snap Focus to ensure the camera focuses at 1.5 metres, why would I use the alternative Snap Focus feature if this uses an AF function? Wouldn’t this override the 1.5 metre zone of focus? I cannot see why I would use this instead of Full Press, I hope you can clarify!
Hi Mark, this is a very late reply but I was working on my streetphototip.com project.
You can use Full Press Snap Focus in Auto Focus mode but not in Snap Focus. In Auto Focus it acts like an emergency panic button. The lens still needs to get to the chosen Snap Focus distance so it is not as fast as using dedicated Snap Focus or Manual Focus mode.
I updated the post and tried to explain the difference between both modes more clearly.
Let me know if it helped.
Best, Michael
Hi there
What are differences between snap focus and manual focus? From my understanding both work similar way.
Thanks
Hi Steve, indeed Snap Focus is Manual Focus but limited to operate with six predefined focus distances only. I updated the post to make it more clear. Let me know how you like it or what is still unclear.
Best, Michael
Nice write up. Can you provide the exit for the image with the guy smoking? It’s great! Thanks.
Hi Andrew, I think you mean the EXIF?
Its Ricoh GR 1/160th f/3.2 ISO 3200 Focus distance around 10cm I think. I updated the post, added EXIF to all images and moved it to my new domain streetphototip.com. Let me know how you like it.
Best, Michael
Great article ! I have just bought the GR III, and am experimenting with a different way of doing things … try this :
* Set the AF mode to ‘Pinpoint AF’ ( ‘Still Image Settings’ menu / ‘Focus’ )
* Assign the ‘Fn’ button to ‘Enable AF’ ( ‘Customize’ menu / ‘Fn Button Setting’ )
* Set ( also in the same menu, further down ) ‘Keep AE Lock’ to ‘Off’
This setup is like manual focus, but much easier to set accurately ( the on-screen ‘distance scale’ is hopelessly small ), and also like Snap focus, but you can choose ANY distance you like, and quickly ( no diving into menus ).
This is great when you have staked out a location and you’re just waiting for the right person to walk into the frame. Before anyone arrives ( or when someone unsuitable is in the right spot ), point the camera at whatever you want to be in sharp focus … press the ‘Fn’ button and the camera will focus on whatever is in the ‘Pinpoint AF’ box ( wait until the box turns green to confirm focus ). Now sit back and wait for your ideal subject to arrive …
When you press the shutter, the camera makes NO attempt to waste time focusing, but it WILL assess the correct auto-exposure setting. All you have to do is concentrate on capturing that decisive moment !
Give it a try, see if it works for you. Best regards, Alan
Very good and well described Tip Alan, thank you for sharing it here!
I like to add that you would also need to deactivate the Half Press AF for the Shutter Button, otherwise you would AF twice.
It is similar to to the AF/MF switching technique.
The only limitation for me (on my GRII) would be no to be able to use the Back-Button as Auto Exposure Lock (AEL)
My steps for approaching an interesting location with stable light conditions are:
– Focusing (AF)
– Locking Focus (Switch to MF)
– Locking Exposure (AEL & +/- Adjustments according to Histogram)
– Waiting & Shooting
Anyway I will try out your technique in town.
Best, Michael
Thanks for the correction Michael, adding ‘Half Press AF for the Shutter Button’ to the instructions. I had already done it, but then forgot to mention it. Doh !
Cheers, Alan
Great article. I loved the illustration of how a person should look like at set distances.
Hey Alan, I’ve noticed that when on TAv mode, the Auto ISO goes bananas on my GRII and goes up to 8000 even if I set it up with a max 3200. I use the camera with the latest firmware. Any way to get past this problem?
Hello and thanks for the detailed, helpful information on GR cameras.
You wrote
>Manual focus mode opens up the whole DoF range but the
>GRs focus adjustment implementation is rather clunky and
>the assisting focus display modes do not help much either IMHO.
With the latest firmware (late 2019), we can now exclude the
macro range from the AF process (making it speedier) or,
we can make it work only within the macro range (again, making it speedier).
Hi Michael! It’s the best write-up I’ve ever read about GR! Thanks for sharing your experiences.
One question by the way.
You mentioned on “How to use Snap focus” section like “Make sure that the Shutter Speed is fast enough to freeze peoples movements (1/250th – 1/500th should be safe)”
Let’s say that I am using Av mode and set an aperture to f/16 and Auto ISO. With this setting, how could I make sure the shutter speed fast enough to freeze people’s movement like you explained? Av mode does not allow us to control the shutter speed as desired, is it?
Hope you understand what I’m trying to ask you.
Thanks again and hope you find this soon!
Javan
Thanks for Asking Javan
To do this:
– Adjust ISO, set it to Auto-Hi.
– Press Fn2 to configure Auto-Hi and set “Change Shutter Speed” to your desired exposure time.
1/250 is fastest on GR II. In the GR III Ricoh has lifted this limit in the firmware.
Note that if there is not enough light for camera to expose with your f/16, max ISO and desired shutter speed it will choose a slower one by itself.
Let me know if this works for you.
Best, Michael
Thanks! I don’t have a Ricoh GR yet and this is article is great to understand how it works. I’m curious though how you approach low ligh settings, e.g indoor family gatherings. AF seems poor in low light (even for latest model) and the snap focus requires high f-stop numbers to give acceptable sharpness (causing unnecessary high ISOs compared to other compacts with better AF). What are your experiences regarding this?
Also, you mentioned poor focus assist in MF mode. Is that true for GRiii as well?
Thanks Peter, I do not have a GR III so I can not comment on that. From my experience with the GR II AF works in low light, however it is slow and can hunt. For near objects the AF assist light helps pretty well. In very low light situations the focus will hunt multiple times. Patience advised. It helps to AF on a high contrast object and reframe. Assuming other compacts would have snap focus, and you would tell them to use f/5.6 and 1/125 for instance, then according the the exposure triangle their ISO would be the same as the GR. So I would not say that other cameras are better in this regard. They surly are when it comes to AF performance. The MF assist display modes are helpful but they are burried in the menu and require multiple button operations to set and de/activate.
Thanks for the quick response! What I intend to ask is what technique you use to focus in low light. Do you still use the high fstops that are used in the pre-programmed snap shot modes and does that give acceptable results in terms of noise? Or can you manage to shoot at 2.8 and still nail the focus?
Hi Peter, as already said in low light I use either AF on high contrast areas or MF. Snap focus modes to not have pre-programmed f-stops. Without knowing the available light and other settings it is hard to say if the noise is acceptable. Somtimes I find 1600 and other times 6400 iso noise acceptable. Nailing focus using f2.8 is possible as it is with any other f-stop.
Hi. I’m totally confused especially I completely don’t understand Full Press Snap. How is it possible that I can use AF and then use Full Press Snap by pressing the same button. I mean release button. I try to figure out what is what. Additionally I have GR III with a firmware 1.41(Full Press Snap by Tuch LCD). How to appoint the AF/Snap switch function to a Fn Button ? I can’t find it in my Fn option menu.
Thanks for asking Jaroslaw. With activated Full Press Snap & in any AF mode: If you half-press then AF will lock focus. If you do not half-press but full-press then the camera focuses on the preselected Snap Focus distance and makes a photo. Does this make it more clear? Regarding “How to appoint the AF/Snap switch?” Read the English GR III manual on p.123 assign “Set Snap” to your Fn button. Let me know if this works.
Thanks a lot. It works obviously. I have to practice a lot. What about Full Press Snap by Touch LCD function ?
Hi, thanks for this helped a lot. What shutter speed would you try to get some motion blur when panning for a moving scooter for example ?
From a static point of shooting & panning I would go try out 1/15th, 1/30th, 1/60th. The result depends a lot on the speed of your panning movement.
Excellent article. Very clear.
Thanks, glad it helped you Andy!
Just to say this article was a great help, Thanks!
Hey!
Really nice guide, thanks a lot! What can I do about people getting mad about me though? Every time I make a picture as close to their face as seen on the pictures in this guide, they start threatening me or even start to punch and kick me. I politely tell them to stop but they continue to hit me hard and explain to me after that I invaded their personal space and wouldn’t consider that they do not want to appear on pictures where they’ll probably look bad. They add that they never gave me the permission to take or publish pictures of them, saying they feel very uncomfortable with it.
What can I do to avoid these situations? I just love street photography and really would love to continue doing these kind close-up snapshots. Do you always ask the people before you shoot them? How do you manage to sustain the natural aspect of your pictures after asking them?
Thank you for advice and bets regards
Tom
Thank you so much, Michael K. This was an incredibly useful article that cleared up a lot of confusion for me. The DOF chart is priceless – great work!